SAP Solution Manager 7.1 Installation Steps:
Operating System Windows Server 2008 R2
Database Server MS SQL Server 2008
Steps:
1. First install the database Server MS SQL Server in Windows Server OS

2. Start SWPM--> Choose --->SAP Solution manager 7.1 support Release 1

3.Assign the SAP SYSTEM ID(SID) =SOL

4. Give the input Kernel for SWPM installation 7.21

5. Enter FQDN Fully qualified domain name or Give After installation.

6. Enter the Master Password(Password for whole installation.

7. Choose SAP system user domain

8. Give the SAPSID and SAP SID Service user PASSWORD.

9. Choose Database host.

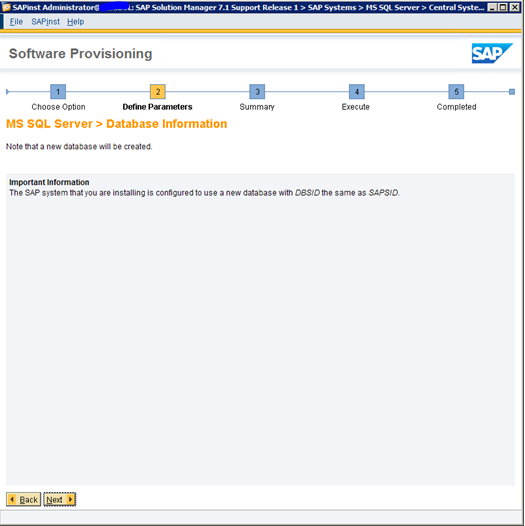
10. Check database information and click ==>next
11. Check Prerequisites check find the any recommended settings and recommended service pack

12. Choose SAP solution manager Export file from local server

13. Provide Sybase database Password.

14, Choose MS SQL Server Details then choose next (choose organization user level)

15. Check file system and if you want to increase add more what you want.

16. Choose temp file directory and path

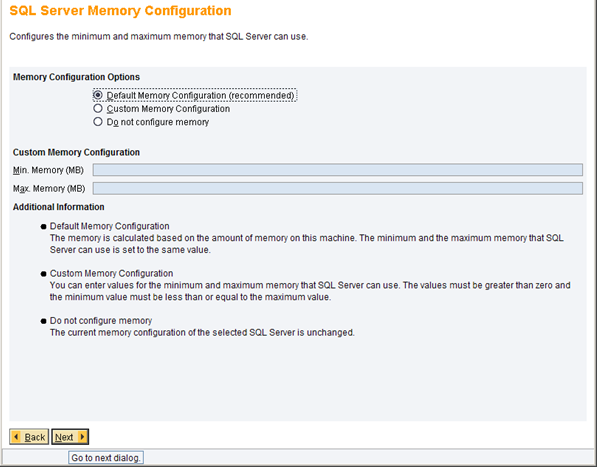
17. Server memory configuration use default system
18. Check General load Parameter in database
/

19 Secure store setting Give password and hit next

20. Give the Java component for SAP Solution Manager

21. Import after installation below Snotes

22. check and Verify the SAP Solution Manager instance

24. Check Central instance parameter.

25. Provide JAVA user name and password.

26. Enter the SAP UME Password

27. integrated into NWDI

28. Configure SLD connection establish a connection in OS level

29. Provide ADS password.

30. Go through the All input before Execute

32.SAP solution manager installed Successfully.


EmoticonEmoticon
Note: only a member of this blog may post a comment.